You can interact with this notebook online: Launch notebook
Shell Info Widget
The Shell Info Widget allows you to explore the chemical abundances in different shells of the model Supernova ejecta interactively within a Jupyter Notebook.
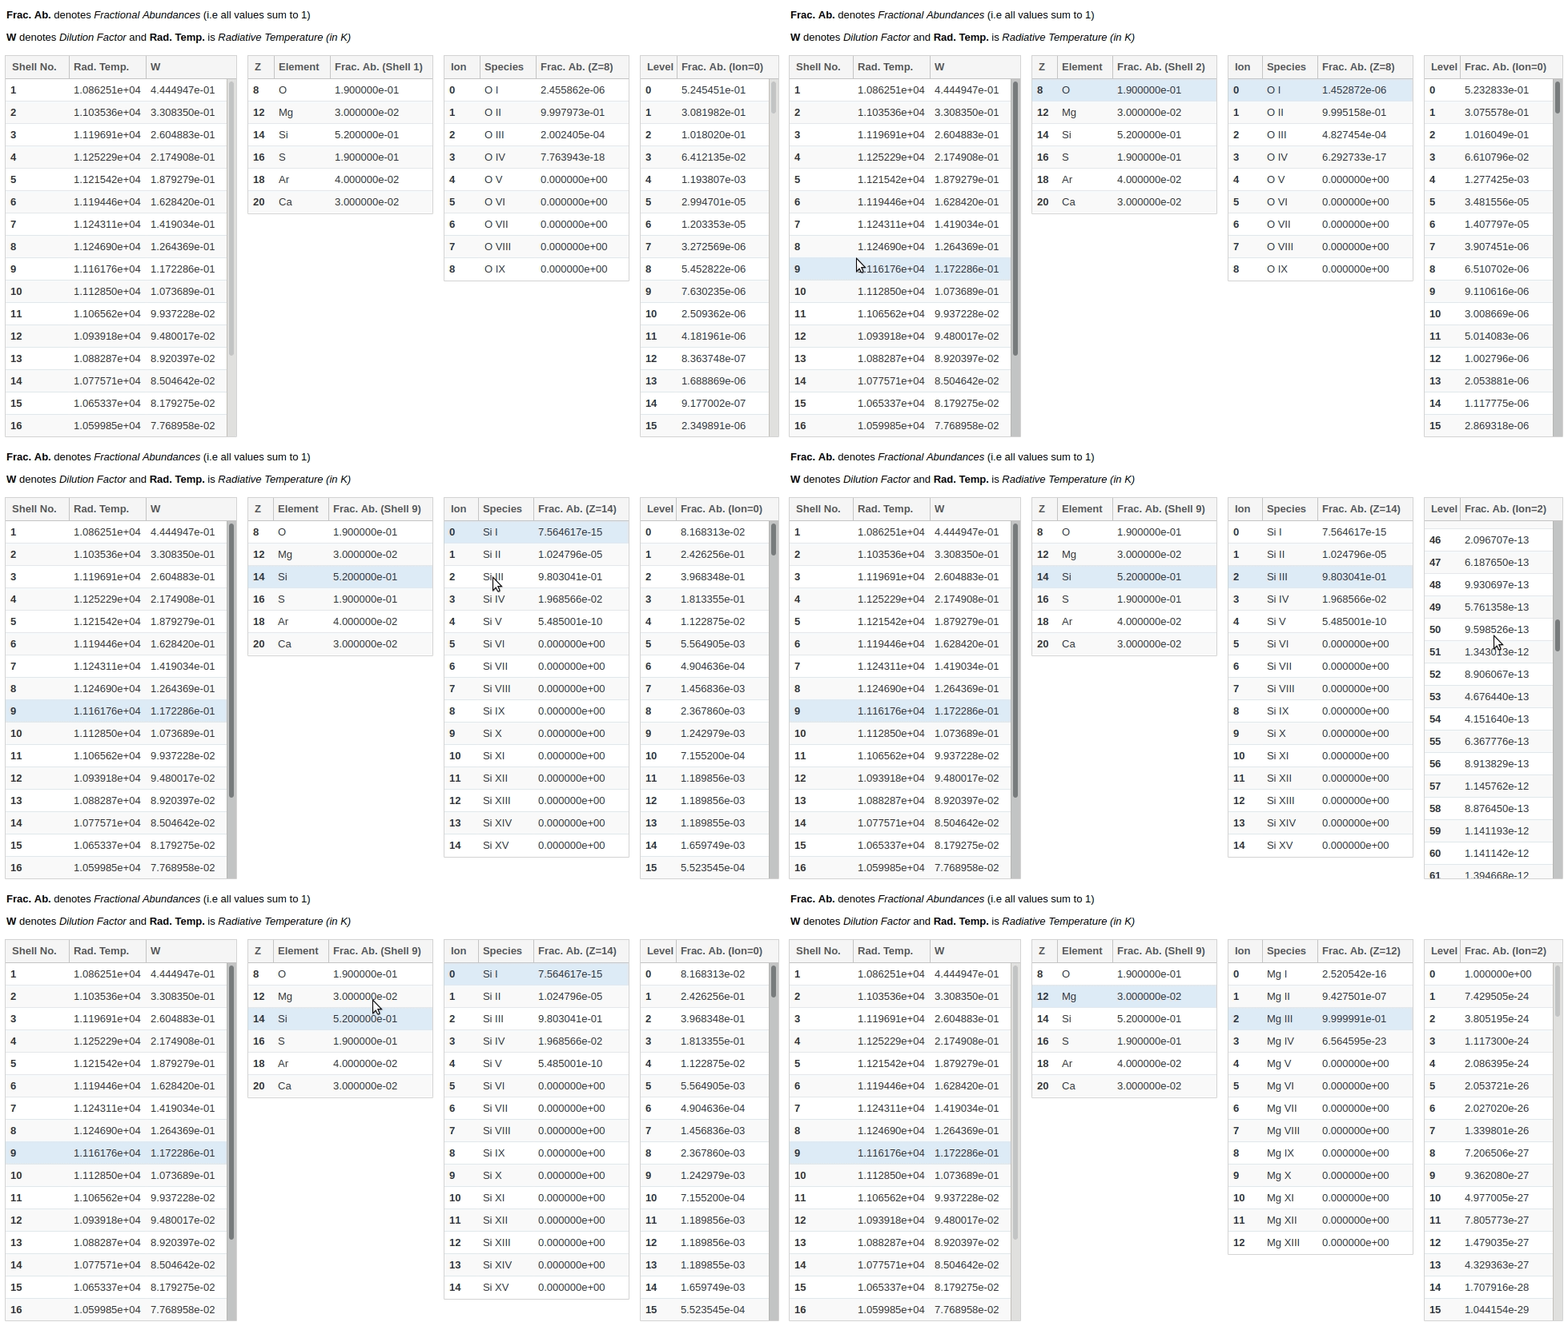
It consists of four interlinked tables — clicking on any row in a table populates data in the table(s) to the right of it. Each table contains the following information:
Shells Data — Radiative temperature and Dilution Factor (W) of each shell (computational partition) of the model Supernova ejecta. Shell numbers are given in ascending order, from the innermost shell to the outermost.
Element Abundances — Fractional mass abundance of each element present in the selected shell.
Ion Abundances — Fractional mass abundance of each ion (species) of the selected element present in the selected shell.
Level Abundances — Fractional mass abundance of each level of the selected ion and element in the selected shell.
Generating the Widget
First, create and run a simulation (see Quickstart for details), then import the helper functions from the visualization subpackage.
[1]:
from tardis import run_tardis
from tardis.io.atom_data import download_atom_data
from tardis.io.configuration.config_reader import Configuration

# Download the atomic data needed to run the simulation
download_atom_data('kurucz_cd23_chianti_H_He_latest')

config = Configuration.from_yaml("tardis_example.yml")
config.montecarlo.tracking.track_rpacket = True

sim = run_tardis(config, virtual_packet_logging=True)
Atomic Data kurucz_cd23_chianti_H_He_latest already exists in /home/runner/Downloads/tardis-data/kurucz_cd23_chianti_H_He_latest.h5. Will not download - override with force_download=True.
Auto-detected Sphinx build environment
Auto-detected Sphinx build environment
Initializing tabulator and plotly panel extensions for widgets to work
Embedding the final state for Jupyter environments
Import ShellInfoWidget from the visualization subpackage
[2]:
from tardis.visualization import ShellInfoWidget
Using a Simulation Object
Pass the simulation object to ShellInfoWidget.from_simulation() and call .display() to start using the widget.
Note for Documentation Viewers
The interactive widget below will not function in the published documentation. To use this widget, please run this notebook locally in a Jupyter environment with TARDIS installed.
[3]:
shell_info_widget = ShellInfoWidget.from_simulation(sim)
shell_info_widget.display()
[3]:
Using a Saved Simulation (HDF File)
Alternatively, if you have a TARDIS simulation saved as an HDF file on disk, you can generate the widget directly from it.
[4]:
# shell_info_widget = ShellInfoWidget.from_hdf('demo.h5')
# shell_info_widget.display()